Xemex A1MB#
What you need#
- Fluvius meter with P1 port
- A1/P1-to-Modbus (A1MB) module + supplied P1 cable
- RS485-to-Ethernet gateway
- 2-wire RS485 cable
- Ethernet cable to site network (switch/router)
1. Physical installation#
-
Connect the A1MB module to the Fluvius meter using the supplied P1 cable.
- This cable provides both power and communication, so no separate power adapter is needed.
-
Connect the A1MB to the RS485-to-Ethernet gateway using a 2-wire RS485 cable.
- Connect the gateway to the site network using Ethernet.
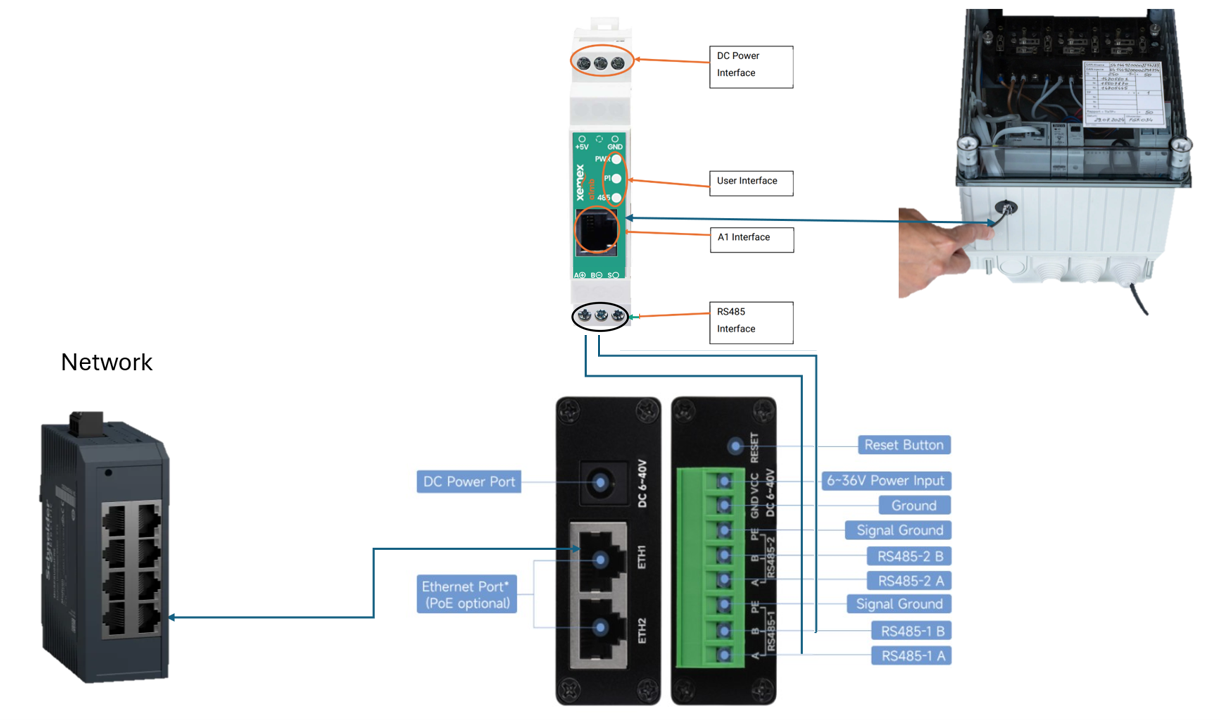
Use the RS485 connectors
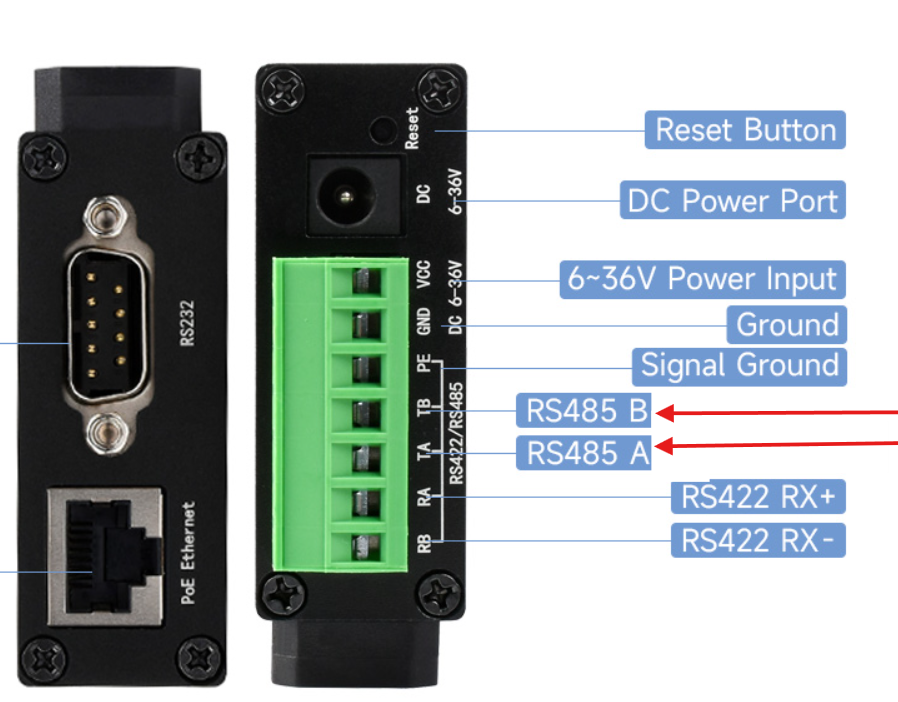
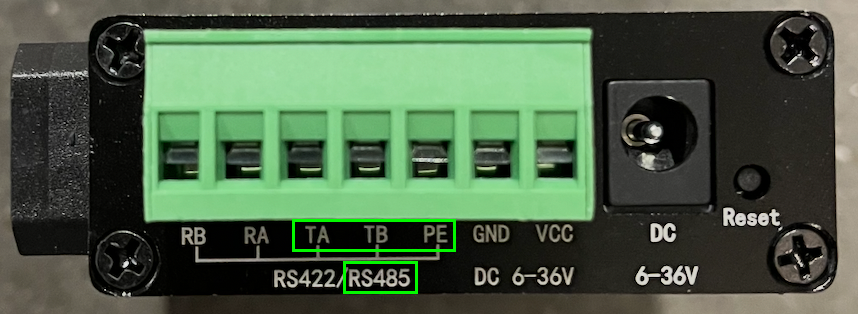
Some gateway modules (with single I/O ports) also offer an RS422 interface alongside the RS485 interface. Make sure to use the RS485 connection as illustrated below.
2. Find the device on the network#
-
Find the device on the network
-
Run an IP scan from your computer to find the gateway.
-
If you cannot find it, reset the gateway:
- Press and hold the reset button for 5 seconds.
- The gateway will revert to the factory IP: 192.168.1.254.
-
Open the gateway web interface in your browser by browsing to the IP address.
- You can leave the password blank. Just pressing enter will redirect you to the user interface.
3. If you are not able to find the device in the network please use the following steps :#
Download the following tool : Virtual serial device management and start it the tool
4. Configure the gateway#
Use a static IP address whenever possible.
-
If the site has managed IT (firewall, VLANs, DHCP reservations), provide the IP address and MAC address to the site IT contact so they can:
- reserve the IP address, and
- allow the device on the network.
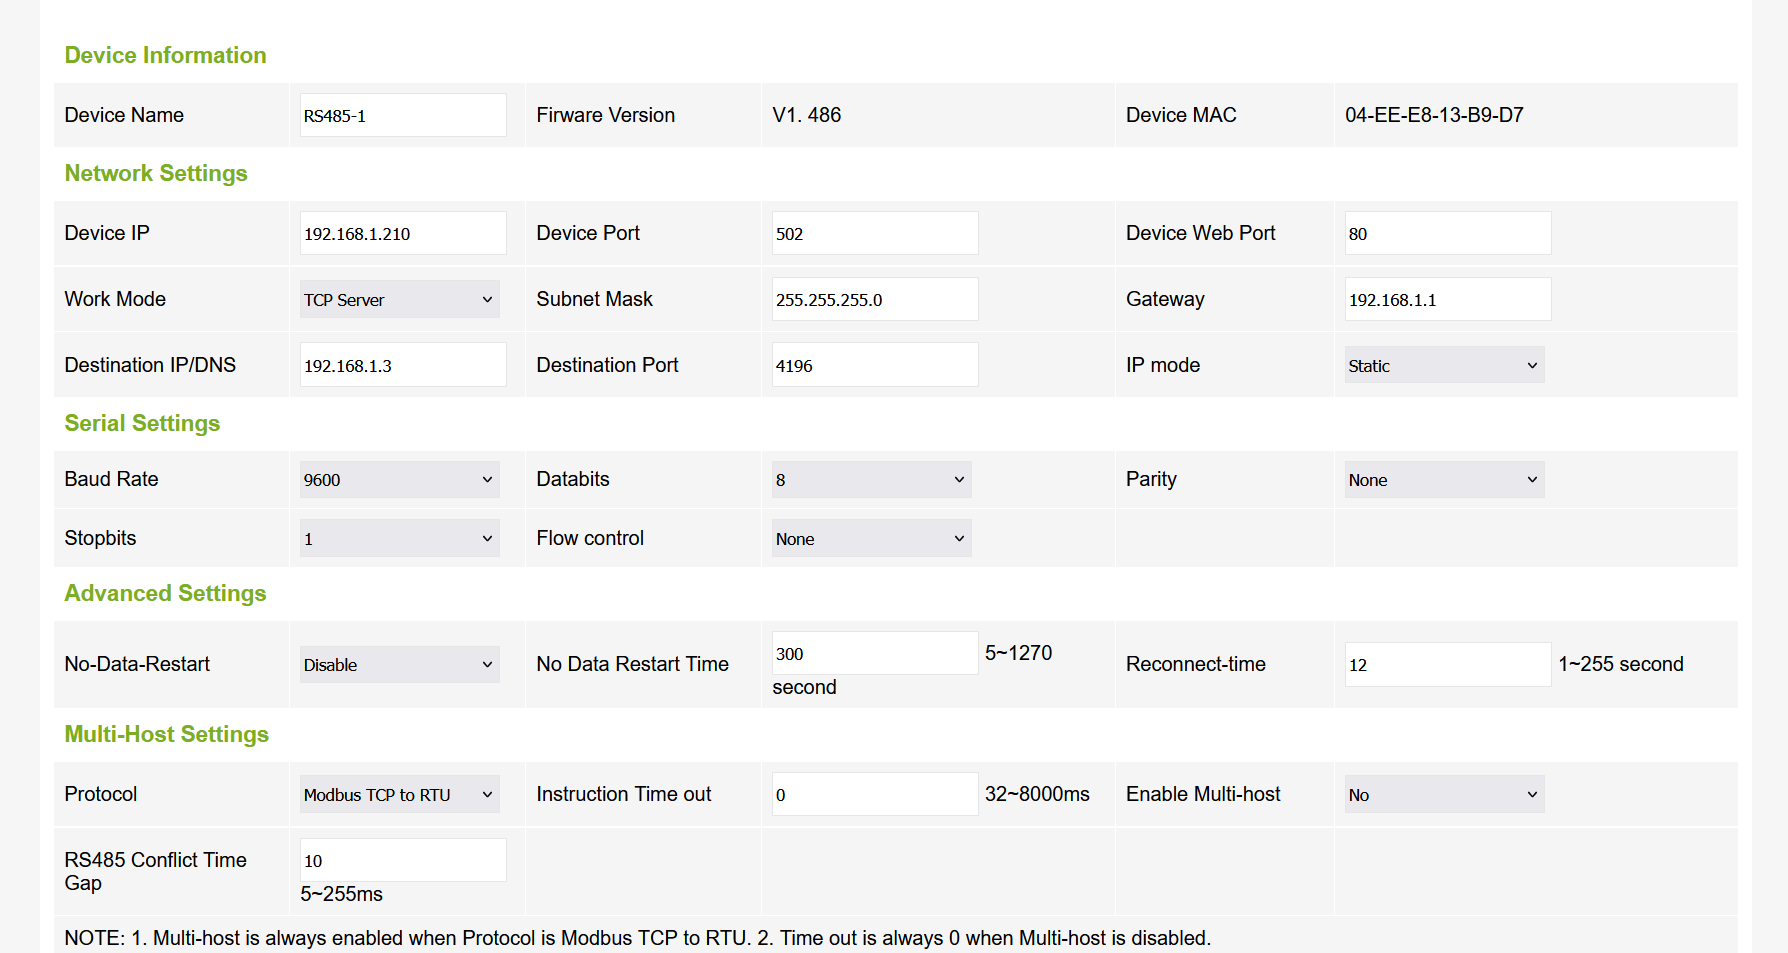
Settings to apply#
Network settings
- IP address: set within the site network range
- Device Port:
502 - Device Web Port:
80
Serial settings
- Baud rate:
9600 - Databits:
8 - Parity:
None - Stopbits:
1
Multi-host settings
- Protocol:
Modbus TCP to RTU
5. Save#
- Submit/apply the changes.
- Confirm the “success” screen appears.
6. Verify Gateway status#
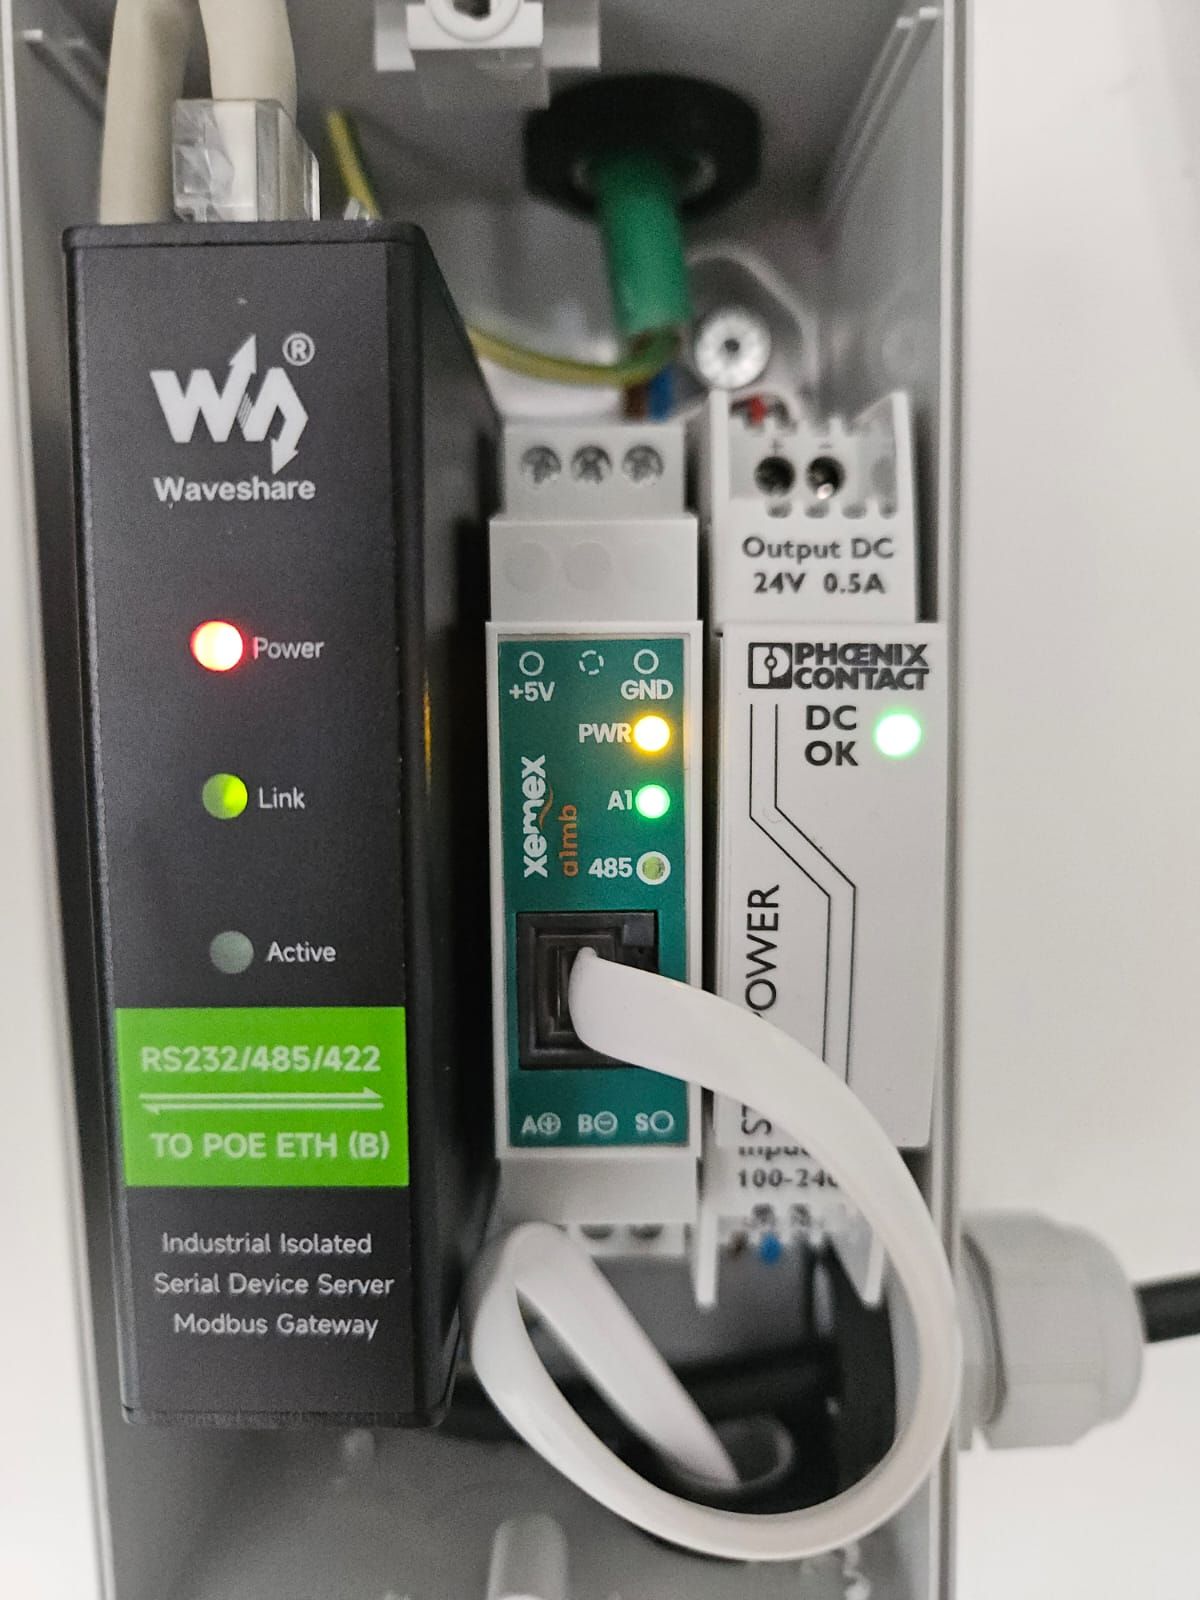
After reboot, verify that the link connection LEDs on the A1MB module match the reference below.
-
The Power LED is a yellow LED that lights up when the Xemex device receives power.
- off → no power
- on → power available
-
The A1 port indicator is a green LED that lights up when A1 messages are correctly received from the meter.
- off → no A1 message received
- on → correct A1 message received
-
The Modbus LED is a red LED that lights up when the Xemex device receives a request from the Modbus master (or client).
- off → no Modbus request received
- on → correct Modbus request received
7. Information to send to Octave#
-
Site meter IP address: Send the IP address of the site meter/gateway to Octave after installation.
-
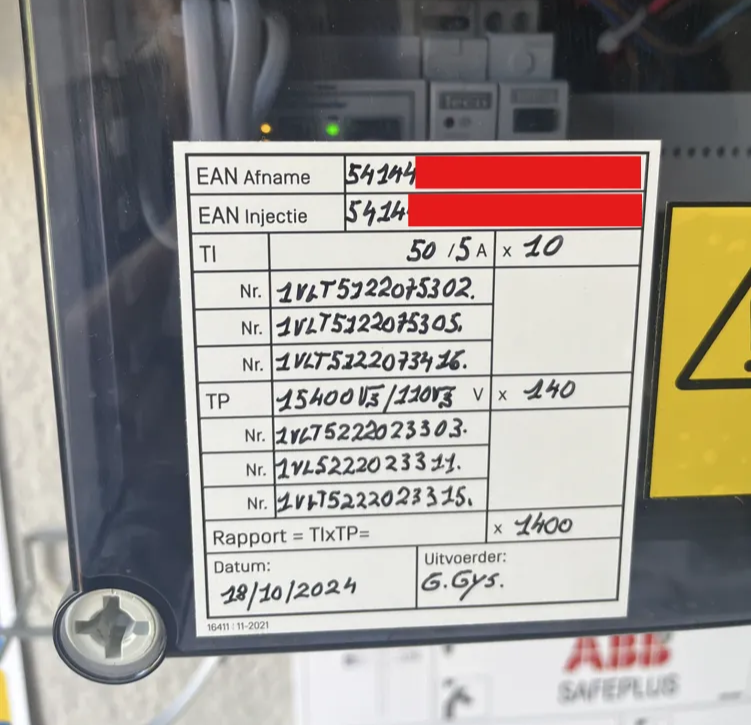
Fluvius meter transformation factors: Send the official current and voltage transformation factors to Octave so the EMS configuration can be finalized.